We all know the feeling: a camera roll overflowing with stunning captures, begging to be transformed into visual masterpieces. But the thought of individually editing each photo can feel like an insurmountable task. Fear not, photography enthusiasts, for the power of batch editing awaits!
Luminar, with its intuitive interface and AI-powered tools, shines as the perfect companion for streamlining your photo editing workflow. Whether you’re a seasoned pro or a budding amateur, this guide will equip you with the knowledge and techniques to batch edit photos like a champion in Luminar.
Step 1: Gathering Your Arsenal
Before diving into batch editing, it’s important to gather the necessary tools and source images. Here are a few key steps:
- Select Your Photos: Start by choosing the images you want to batch edit. Consider factors like similar lighting, theme, or style to ensure efficient batch editing.
- Luminar Version: Different Luminar versions offer varying degrees of batch editing functionalities. Ensure you’re using the latest version (AI or Neo) for maximum benefits.
Step 2: The Power of Presets
One of Luminar’s most useful features for batch editing is its library of presets – both built-in and customizable.
- Built-in Magic: Luminar boasts a diverse collection of built-in presets covering various styles and genres. Experiment and find presets that resonate with your desired aesthetic.
- Fine-Tune for Uniqueness: Don’t be afraid to tweak the presets! Adjusting sliders or masking specific areas allows you to personalize the preset while maintaining a consistent batch edit look.
- Create Your Own: For complete control, build your own custom presets. Save tweaks you frequently use to apply them with lightning speed in future batches.

Step 3: Mastering the Sync Dance
Easily Luminar’s most valuable feature for efficient batch editing is its “Sync” function. Here’s how it works its magic:
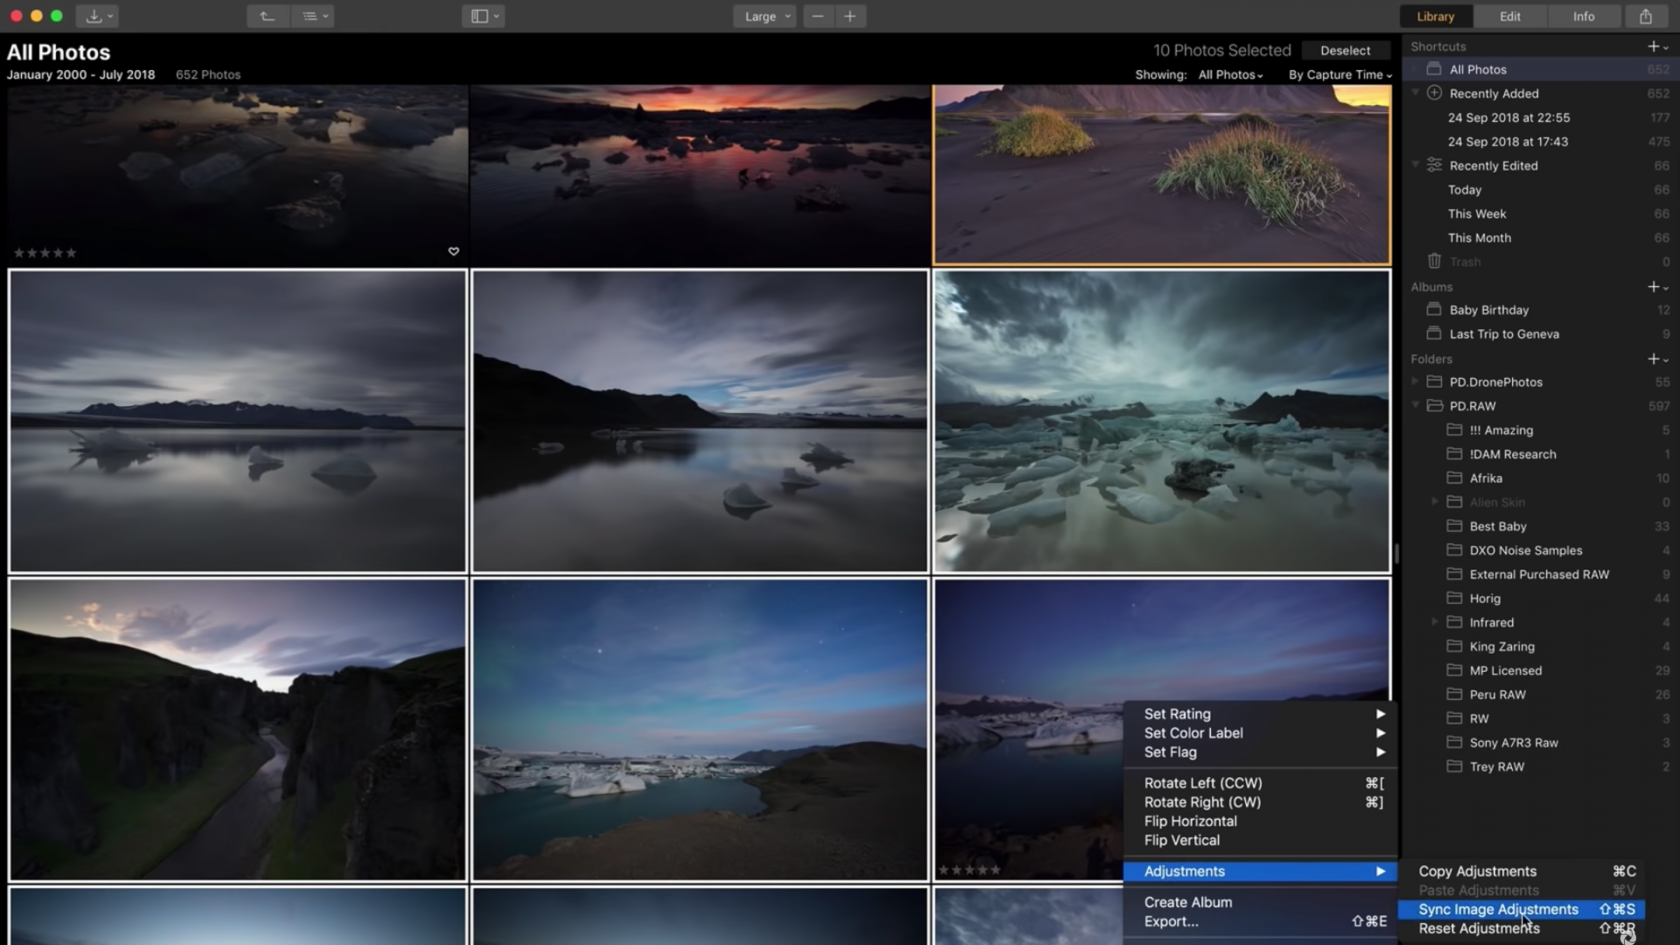
- Sync Adjustments: This game-changer lets you apply edits from one photo to multiple images. Edit your “hero” photo with your desired adjustments, then right-click and select “Sync Adjustments.” Choose the target photos, and voila! Instant batch editing magic.
- Selective Syncing: Don’t want to apply all edits equally? Right-click adjustments individually within the “Edit” mode and choose “Sync selected adjustments.” This allows for more nuanced batch editing based on specific needs.
- AI to the Rescue: Luminar AI’s AI-powered tools like Sky Replacement and AI Portrait can be applied in batches, saving you time and effort on repetitive tasks.
Step 4: Advanced Batch Editing Techniques
Take your Luminar batch editing to the next level with these pro techniques:
- Filters for Finesse: Utilize the “Filter” option in the Library module to refine your image selection based on criteria like camera model, date, or even keywords. This helps group similar photos for efficient batch editing.
- Export Like a Pro: Take advantage of Luminar’s customizable export settings. Define preferred file formats, resolutions, and watermarking options to streamline your export process for multiple photos.
- Keywords for Organization: Assign relevant keywords to your photos during batch editing. This makes future image searches and organization a breeze.
Step 5: Pro Tips for Workflow Optimization
To take your Luminar skills to expert levels, utilize these workflow optimization tips:
- Prioritize Raw Files: Editing Raw files offers greater flexibility and quality compared to JPEGs. If your camera allows, capture in Raw for superior batch editing results.
- Leverage Workspaces: Create custom workspaces in Luminar to save your preferred tools, layouts, and settings. This reduces setup time for your future batch editing sessions.
- Hardware Considerations: Invest in a powerful computer with sufficient RAM and a good graphics card for faster processing during large batch edits.
Remember, with practice and experimentation, you’ll master the art of batch editing in Luminar. Embrace the efficiency, unleash your creativity, and transform your photo editing from a chore to a joyful experience. Soon enough, you’ll be batch editing like a pro, turning your photo library into a collection of stunning masterpieces with minimal effort. Now, go forth and conquer those photo batches!


Add Comment