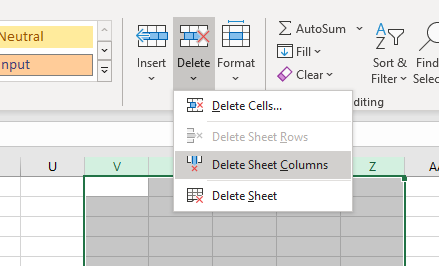
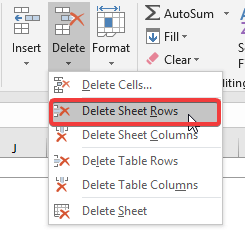
Working with enormous datasets in Microsoft Excel is a common scenario for many professionals, analysts, and data enthusiasts. However, when you need to trim the fat and remove a substantial chunk of rows – let’s say, 100,000 of them – the task can seem daunting. Manually clicking through thousands of rows to delete them one by one is not only inefficient but also incredibly time-consuming and prone to errors.
Fear not, Excel warriors! This comprehensive guide delves deep into several effective methods for deleting 100,000 rows in Excel, saving you valuable time and frustration. We’ll explore when it’s appropriate to delete large datasets, how to identify the rows you want to remove, and step-by-step instructions for executing the deletion process efficiently.
Should You Delete 100,000 Rows in Excel?
Before we dive into the deletion methods, it’s crucial to pause and consider whether deleting 100,000 rows is truly necessary. In some cases, there might be better alternatives that can achieve your desired outcome without permanently removing data.
Potential Alternatives to Deleting Large Datasets
- Filtering: Instead of deleting rows permanently, you can filter your data to hide unwanted rows temporarily. This way, you can still access the information later if needed, making the process reversible.
- Advanced Filtering (Tables): If you’re working with a large dataset formatted as a table, Excel’s advanced filtering options allow you to extract specific data into a new table, essentially achieving the same outcome as deleting unwanted rows without permanently removing the data.
- PivotTables: PivotTables are fantastic tools for summarizing and analyzing large datasets. You can create a PivotTable to focus on specific trends or insights without deleting the underlying data, providing a more flexible and non-destructive approach.
When Deleting 100,000 Rows in Excel Makes Sense
While the alternatives mentioned above can be helpful in certain situations, there are cases where deleting a large number of rows is the most appropriate course of action. Here are a few examples:
- Data Cleaning: If your spreadsheet contains a significant number of duplicate rows or irrelevant information, deleting these rows can significantly improve the efficiency and clarity of your data.
- Preparing for Analysis: You might need to isolate a specific subset of data for further analysis. Deleting extraneous rows can help streamline your data and prepare it for tools like PivotTables or charts, enhancing the accuracy and relevance of your analysis.
- File Size Reduction: Large spreadsheets with hundreds of thousands of rows can become cumbersome and slow down your computer’s performance. Deleting unnecessary rows can significantly reduce file size, improving overall efficiency and responsiveness.

Identifying Rows to Delete
Once you’ve confirmed that deleting a large number of rows is the right approach for your specific scenario, the next step is to identify the rows you want to remove. Here are a few methods to consider:
Manual Selection
If the rows you want to delete are clustered together, you can manually select them by clicking and dragging your cursor over the desired range. This approach might be feasible for smaller datasets but can quickly become impractical when dealing with datasets as large as 100,000 rows.
Filtering
Leveraging Excel’s filtering capabilities can be a more efficient way to narrow down your data based on specific criteria. This allows you to select only the rows that meet your deletion criteria, making the process more targeted and accurate.
Find and Replace
If the rows you want to delete share a common value in a particular column, you can utilize the “Find and Replace” function to quickly locate and select them. This approach can be particularly useful when dealing with large datasets that contain patterns or commonalities.

Methods to Delete 100,000 Rows in Excel
Now that you’ve identified the rows you want to remove, let’s explore the various methods you can employ to delete 100,000 rows in Excel efficiently.
Method 1: Using the Delete Shortcut (For Smaller Deletions)
While not the most efficient method for deleting massive datasets, the good old-fashioned delete shortcut can still be a viable option for relatively smaller sets of unwanted rows (think a few thousand). Here’s how to use it:
- Select the rows you want to delete by holding the Ctrl key and clicking on individual rows, or use Shift + click to select a range of rows.
- Once the desired rows are selected, press the Delete key on your keyboard.
This method is quick and easy, but it can become tedious and time-consuming when dealing with datasets as large as 100,000 rows.
Method 2: Go To Special
Excel’s “Go To Special” feature offers a more efficient way to target specific rows for deletion, particularly blank rows. Here’s how to use it:
- Select any cell in your spreadsheet.
- Press F5 (or navigate to the Home tab and click “Find & Select” followed by “Go To”).
- In the “Go To” dialog box, click the “Special” button.
- In the “Go To Special” window, choose the option that aligns with your deletion needs. For instance, select “Blanks” to delete all blank rows.
- Click “OK.” This will select all the rows matching your criteria (e.g., all blank rows).
- Right-click anywhere in the selected range and choose “Delete” from the context menu.
Method 3: Filter and Delete
The filter function in Excel allows you to narrow down your data view and then delete unwanted rows efficiently. Here’s a step-by-step breakdown:
- Click on any cell within your dataset.
- Navigate to the Data tab and click the down arrow next to “Filter” in the “Sort & Filter” group. This activates filters on all your data columns.
- Click the down arrow in the header row of the column you want to use for filtering.
- Select the criteria for filtering. For example, you might choose to filter and hide rows containing a specific value, those that are blank, or those that fall outside a certain date range.
- With only the desired rows visible, right-click anywhere in the selected range and choose “Delete” from the context menu.
Method 4: Delete Entire Sheets (For Large Datasets Spread Across Sheets)
If the 100,000 rows you want to delete are spread across multiple sheets in your workbook, consider deleting the entire sheet(s) containing them. Here’s how:</p
- Right-click on the sheet tab of the sheet you want to delete.
- In the context menu, select “Delete.”
Caution: Be absolutely certain you want to delete the entire sheet before proceeding. This action is permanent, and there’s no way to recover the deleted data unless you have a backup.
Method 5: VBA for the Win (For Advanced Users)
For those comfortable with macros, VBA (Visual Basic for Applications) offers a powerful and automated approach to deleting large numbers of rows in Excel. While this method requires a bit more technical knowledge, it can be a real time-saver when dealing with massive datasets.
Here’s a basic example to get you started (consult a developer or VBA expert for more complex scenarios):
- Press Alt + F11 to open the VBA editor.
- Insert a new module by clicking “Insert” > “Module.”
- Copy and paste the following code into the module window:
Sub DeleteRows()
    ' Replace "Sheet1" with the actual name of your sheet containing the data
    Range("A1").CurrentRegion.Delete Shift:=xlUp
End Sub
Copy code
- Save the code and return to your Excel spreadsheet.
- Run the macro by pressing Alt + F8, selecting the macro name (“DeleteRows” in this example), and clicking “Run.”
This code deletes all rows starting from cell A1 down to the last used cell in the current region of your sheet.
Important Note: While VBA can be a powerful tool, it’s crucial to understand the code you’re using to avoid accidentally deleting unintended data. Always exercise caution and test your macros on a copy of your spreadsheet before running them on your original data.
Additional Considerations for Deleting Large Datasets in Excel
AutoSave
Before deleting a large number of rows, ensure that AutoSave is enabled in Excel. In case of any unexpected issues or errors during the deletion process, you can recover your work from the last saved version, minimizing the risk of data loss.
Performance
Deleting a massive number of rows can strain your computer’s resources, especially if you’re working with a spreadsheet that already contains a significant amount of data. To optimize performance, consider saving your work beforehand and closing any unnecessary programs or applications to free up system memory.
Testing
If you’re unsure about the impact of deleting specific rows or if you’re working with mission-critical data, it’s wise to test the deletion process on a copy of your spreadsheet first. This allows you to ensure you’re deleting the correct data without affecting the original file, providing an extra layer of safety and peace of mind.
Conclusion
Working with large datasets in Excel can be a daunting task, but with the methods outlined in this guide, you’re well-equipped to tackle the challenge of deleting 100,000 rows efficiently. Remember to choose the method that best suits your data structure, deletion criteria, and comfort level.
By leveraging techniques like filtering, the “Go To Special” feature, advanced filtering for tables, sheet deletion, and even VBA macros, you can streamline your spreadsheets, improve performance, and focus on the valuable insights your data holds.
Don’t let massive datasets hold you back – take control of your Excel workbooks and unleash the power of efficient data management today!


Add Comment