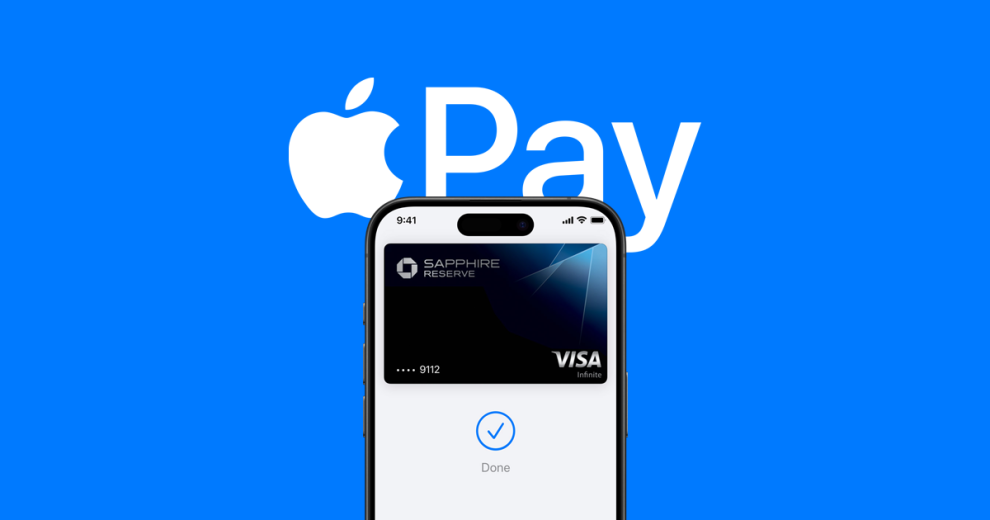
Picture this: you’re standing in line at your favorite coffee shop, ready to pay for your morning latte. Instead of rummaging through your wallet for cash or a credit card, you simply tap your iPhone or Apple Watch on the contactless payment terminal, and voila! Your payment is processed in a matter of seconds. This is the magic of Apple Pay, a secure, convenient, and wallet-free payment method that’s revolutionizing the way we make transactions.
In this comprehensive guide, we’ll dive deep into the world of Apple Pay, exploring its features, setup process, and how to use it across various Apple devices. Whether you’re a seasoned Apple user or new to the ecosystem, you’ll discover how Apple Pay can streamline your payment experience and provide an extra layer of security. Let’s get started!
What is Apple Pay?
At its core, Apple Pay is a contactless payment system that allows you to make purchases using your Apple devices. It securely stores your credit, debit, or prepaid card information within the Wallet app on your iPhone, Apple Watch, iPad, or Mac. When you’re ready to make a payment, your device communicates with the payment terminal using Near Field Communication (NFC) technology, ensuring a swift and secure transaction.
What sets Apple Pay apart from traditional payment methods is its emphasis on security and privacy. When you add a card to your Wallet app, Apple assigns a unique Device Account Number, which is encrypted and securely stored on a dedicated chip in your device. This means that your actual card numbers are never shared with merchants or stored on Apple’s servers. Additionally, each transaction requires authentication through Face ID, Touch ID, or your device passcode, adding an extra layer of protection against unauthorized use.
Setting Up Apple Pay on Your iPhone
To start using Apple Pay on your iPhone, you’ll need to add your credit, debit, or prepaid cards to the Wallet app. Here’s a step-by-step guide:
- Open the Wallet app on your iPhone.
- Tap the “+” icon in the top-right corner.
- Follow the prompts to add your card. You can either scan your card using your iPhone’s camera or manually enter the card details.
- Your card issuer will verify your information and approve the card for use with Apple Pay.
- Once added, your card will appear in the Wallet app, ready for use.
Using Apple Pay on Your iPhone
With your cards set up in the Wallet app, you’re ready to start making payments with your iPhone. Here’s how it works:
- Look for the contactless payment symbol or Apple Pay logo at the payment terminal.
- Double-click the side button on your iPhone (for models with Face ID) or double-click the home button (for models with Touch ID).
- Authenticate the transaction using Face ID, Touch ID, or your passcode.
- Hold the top of your iPhone near the payment terminal until you see “Done” and a checkmark on the screen.
That’s it! Your payment is processed securely, and you’ll receive a confirmation of the transaction on your iPhone.
Apple Pay on Your Apple Watch
Apple Pay on your Apple Watch offers even more convenience, as you can make payments without needing to take out your iPhone. To set up Apple Pay on your Apple Watch, open the Watch app on your paired iPhone, tap “Wallet & Apple Pay,” and follow the prompts to add your cards.
To make a payment with your Apple Watch:
- Double-click the side button on your Apple Watch.
- Scroll to the card you want to use.
- Hold your Apple Watch near the payment terminal until you feel a gentle tap and hear a beep, indicating the transaction is complete.
Using Apple Pay on iPad and Mac
Although Apple Pay is primarily associated with iPhone and Apple Watch, you can also use it on your iPad and Mac for certain transactions.
On iPad, Apple Pay is available for in-app purchases and web purchases in Safari. When you see the Apple Pay button at checkout, simply tap it and authenticate the transaction using Face ID or Touch ID.
On Mac, Apple Pay is available for web purchases in Safari. If your Mac has Touch ID, you can authenticate transactions directly. If your Mac doesn’t have Touch ID, you can complete the transaction using Apple Pay on your paired iPhone or Apple Watch.

Security and Privacy with Apple Pay
Security and privacy are at the forefront of Apple Pay’s design. As mentioned earlier, your actual card numbers are never stored on your device or Apple’s servers. Instead, a unique Device Account Number is assigned, encrypted, and securely stored in the Secure Element, a dedicated chip in your device.
When you make a transaction, the Device Account Number, along with a transaction-specific dynamic security code, is used to process the payment. This means that your actual card details are never exposed, reducing the risk of fraud.
Additionally, Apple Pay transactions require authentication through Face ID, Touch ID, or your device passcode. This ensures that even if your device is lost or stolen, unauthorized transactions cannot be made without your biometric authentication or passcode.
Apple Pay for Travel and Transit
Apple Pay isn’t just for retail purchases; it’s also making waves in the travel and transit industry. With Apple Pay Express Transit, you can quickly pay for fares on supported public transport systems without needing to authenticate each transaction. Simply hold your iPhone or Apple Watch near the transit reader, and your fare will be automatically paid.
In addition to Express Transit, many airlines and travel companies now accept Apple Pay as a payment method, making it easier than ever to book flights, hotels, and more using your Apple devices.
Troubleshooting Apple Pay Issues
While Apple Pay is generally reliable, you may occasionally encounter issues. Here are some troubleshooting tips:
- Ensure your device is compatible with Apple Pay and running the latest software version.
- Check that your card is supported by Apple Pay and that your card issuer has approved it for use.
- If you’re having trouble adding a card, contact your card issuer for assistance.
- Make sure that NFC is enabled on your device (Settings > Wallet & Apple Pay).
- If a transaction is declined, try authenticating with your passcode instead of Face ID or Touch ID.
Conclusion
Apple Pay offers a secure, convenient, and innovative way to make payments using your Apple devices. By setting up Apple Pay on your iPhone, Apple Watch, iPad, or Mac, you can enjoy the benefits of contactless payments, reduced fraud risk, and a streamlined checkout experience.
As more retailers, apps, and services adopt Apple Pay, the future of payments looks increasingly digital. By mastering the art of using Apple Pay, you’ll be well-equipped to embrace this evolution and enjoy the convenience and security it brings.
So, whether you’re buying a coffee, shopping online, or commuting to work, Apple Pay has you covered. Say goodbye to bulky wallets and hello to the future of payments with Apple Pay!


Add Comment