Why Snapchat is the Ultimate Social Media Experience
Before we dive into the nitty-gritty of setting up your account, let’s explore what makes Snapchat stand out from other social media platforms:
- Ephemeral Messaging: Snaps (photos and videos) disappear after the recipient views them, encouraging spontaneity and reducing the pressure of curating a perfect online persona.
- Creative Tools: Snapchat’s extensive collection of filters, lenses, and drawing tools allow users to express their creativity and add a touch of whimsy to their snaps.
- Engaging Stories: Users can compile their snaps into a chronological story that disappears after 24 hours, providing a glimpse into their daily lives.
- Private Messaging: Snapchat’s chat feature enables users to have private conversations with friends, fostering a sense of intimacy and connection.
How to Creating Your Snapchat Account

Now that you understand the allure of Snapchat, let’s walk through the process of setting up your account:
Step 1: Download the Snapchat App
Visit the App Store (for iOS devices) or the Google Play Store (for Android devices) and search for “Snapchat.” Download and install the app on your smartphone.
Step 2: Sign Up for an Account
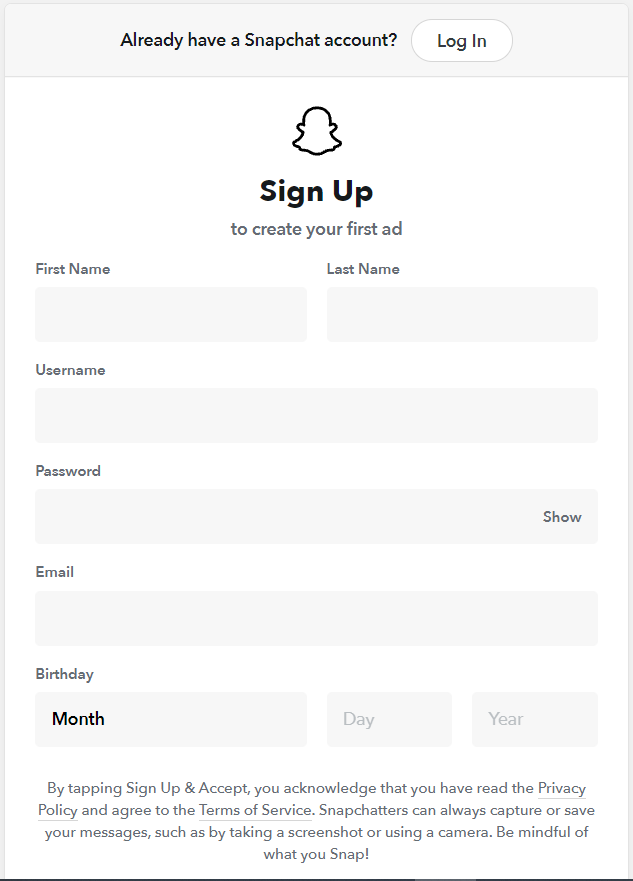
Open the Snapchat app and tap on the “Sign Up” button. You’ll be prompted to enter the following information:
- Full Name
- Username (choose a unique handle)
- Password (create a strong, secure password)
- Birthday (you must be at least 13 years old to use Snapchat)
- Phone Number or Email Address (for account verification)
Step 3: Verify Your Account
If you provided a phone number, Snapchat will send you a verification code via SMS. Enter the code to confirm your account. If you used an email address, check your inbox for a verification link.
Step 4: Find and Add Friends
Snapchat can scan your phone’s contact list to find friends who already have accounts. You can also add friends by searching for their usernames or scanning their Snapcodes (unique QR codes associated with each account).
Congratulations! You now have a Snapchat account and are ready to start snapping.
Navigating the Snapchat Interface
Snapchat’s user interface may seem a bit unconventional at first, but with a little guidance, you’ll be navigating it like a pro:
Camera Screen
The camera screen is the first thing you see when you open the app. This is where you capture your snaps. Tap the circular button at the bottom of the screen to take a photo, or hold it down to record a video.
Chat Screen
Swipe right from the camera screen to access the Chat screen. Here, you’ll find your private conversations with friends and a list of recent stories.
Discover Screen
Swipe left from the camera screen to access the Discover screen. This is where you’ll find stories from popular brands, celebrities, and content creators.
Stories Screen
From the camera screen, swipe left again to access the Stories screen. Here, you can view your friends’ stories and create your own by tapping on your profile icon.
Mastering the Art of Snapping
Now that you’re familiar with the Snapchat interface, it’s time to start snapping! Here are some tips to help you create engaging and creative snaps:
Experiment with Filters and Lenses
Snapchat’s filters and lenses are what set it apart from other social media platforms. Swipe left or right on the camera screen to access filters, which can add color effects, geofilters, or information like the time or weather to your snaps. To access lenses, press and hold on your face until the lens options appear. Lenses can distort your features, add animations, or even transform your surroundings.
Add Text and Drawings
After capturing a snap, tap on the screen to add text. You can change the color and size of the text by tapping on the “T” icon. To draw on your snap, tap on the pencil icon and select a color. Use your finger to doodle or write messages on your snap.
Adjust the Time Limit
By default, snaps disappear after 10 seconds. However, you can adjust the time limit by tapping on the clock icon after capturing a snap. Choose a duration between 1 and 10 seconds, or select the infinity icon to let the recipient view the snap for as long as they like.
Save Your Snaps
If you want to save a snap before sending it, tap on the download icon (downward-facing arrow) to save it to your phone’s camera roll. To save a snap after posting it to your story, go to the Stories screen, tap on the three dots next to your story, and select “Save.”
Engaging with the Snapchat Community
Snapchat is all about connecting with friends and sharing experiences. Here are some ways to engage with the Snapchat community:
Send Snaps to Friends
To send a snap to one or more friends, tap on the blue arrow icon after capturing a snap. Select the friends you want to send the snap to, and then tap on the blue arrow again to send.
Create a Story
Stories are compilations of snaps that disappear after 24 hours. To create a story, capture a snap and then tap on the square icon with a plus sign at the bottom of the screen. Your snap will be added to your story, which your friends can view an unlimited number of times within the 24-hour window.
Interact with Friends’ Stories
When viewing a friend’s story, you can reply to individual snaps by tapping on the screen and sending a chat message. You can also take a screenshot of a snap by pressing the power and volume-down buttons simultaneously (just be aware that your friend will be notified if you do this).
Participate in Snapchat Streaks
A Snapchat streak occurs when you and a friend send snaps to each other for consecutive days. A fire emoji and a number will appear next to your friend’s name to indicate the length of your streak. Keep your streaks going by sending at least one snap per day to each other.
Conclusion
Snapchat offers a unique and engaging way to connect with friends and share life’s moments. By following this guide, you’ll be well on your way to creating an account, navigating the app’s features, and snapping like a pro. Remember to have fun, be creative, and stay connected with your friends on this exciting social media platform.
Happy snapping!


Add Comment