Fortunately, managing your OneDrive storage is a straightforward process. In this comprehensive guide, we’ll walk you through the steps to delete OneDrive files you no longer need, freeing up valuable space and streamlining your cloud-based experience.
Understanding the OneDrive File Deletion Process
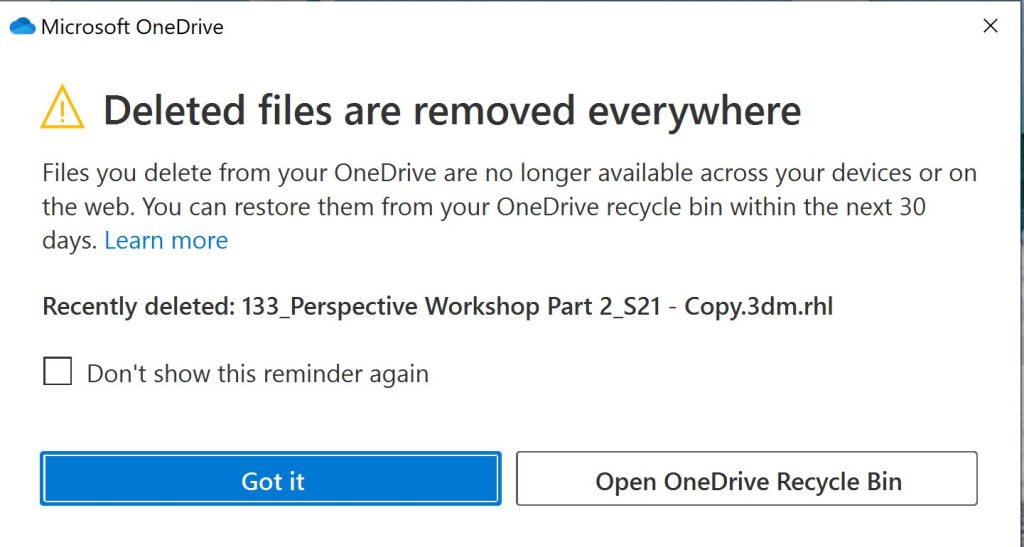
Before we dive into the specifics of deleting files from OneDrive, it’s essential to understand how the process works. Unlike deleting files from your local computer’s hard drive, removing items from your OneDrive doesn’t result in immediate erasure. Instead, OneDrive moves the deleted files to a virtual Recycle Bin, giving you a safety net in case you accidentally delete something important.
Does Deleting Files Still Take Up Space?
A common concern when deleting files from cloud storage is that they may still occupy space, even after being sent to the Recycle Bin. Fortunately, this is not the case with OneDrive. Files residing in the OneDrive Recycle Bin do not count towards your storage quota. They’re essentially tucked away until you decide to permanently erase them or restore them to their original location.
How Long Do Deleted Files Stay in the OneDrive Recycle Bin?
The duration that deleted files remain in the OneDrive Recycle Bin varies depending on the type of Microsoft account you have:
- Personal OneDrive Accounts: Deleted files are stored in the Recycle Bin for 30 days. After this timeframe, they are permanently erased.
- OneDrive for Business Accounts: The retention period for deleted files in OneDrive for Business accounts can be customized by the organization’s IT administrators. It’s always a good practice to check with your IT department if you’re unsure about the specific deletion policy for your business OneDrive account.
How to Delete OneDrive Files Across Different Devices
The process of deleting OneDrive files is remarkably similar across various devices. Let’s explore the step-by-step instructions for deleting files on your desktop computer, web browser, and mobile device.
Deleting OneDrive Files on a Desktop Computer (Windows or Mac)
- Access OneDrive: Locate the OneDrive icon in your system tray (Windows) or menu bar (Mac). Right-click on the icon and select “Open OneDrive.”
- Navigate to Your Files: Within the OneDrive folder window, browse through your files and folders to locate the items you want to delete.
- Select Files for Deletion: Hold down the “Ctrl” key (Windows) or “Command” key (Mac) to select multiple files. Alternatively, you can click on a single file and then use the keyboard shortcut “Ctrl+D” (Windows) or “Command+D” (Mac) to select all files in the current folder.
- Send to Recycle Bin: Once you’ve selected the unwanted files, right-click on any of the highlighted files and choose “Delete” from the context menu. This will send the selected files to the OneDrive Recycle Bin.
Deleting OneDrive Files in a Web Browser
- Sign in to OneDrive: Visit https://www.microsoft.com/en-us/microsoft-365/onedrive/online-cloud-storage and log in using your Microsoft account credentials.
- Locate Your Files: Once logged in, you’ll see a list of your OneDrive files and folders. Navigate through the folders to find the files you want to delete.
- Select and Delete: Click the checkbox next to the files you want to delete. You can also select multiple files by holding down the “Ctrl” key (Windows) or “Command” key (Mac) while clicking on the files. Once you’ve selected your files, click the “Move to trash” button located at the top of the page. This will send the files to the OneDrive Recycle Bin.
Deleting OneDrive Files on a Mobile Device (Android or iOS)
- Open the OneDrive App: Locate the OneDrive app on your mobile device and launch it.
- Find Your Files: Within the OneDrive app, navigate through your folders to find the files you want to delete.
- Selecting for Deletion: Tap and hold on a file to select it. You’ll then see a checkbox appear next to the file. You can tap on additional files to select them for deletion.
- Moving to Trash: Once you’ve selected the files you want to delete, tap on the three dots menu in the top right corner of the app screen. From the menu, choose “Delete.” This will send the selected files to the OneDrive Recycle Bin.

Deleting Entire Folders in OneDrive
The deletion process outlined above also applies to deleting entire folders in OneDrive. Simply follow the same steps for selecting files, and instead of individual files, choose the folder you want to remove. Once you’ve selected the folder, right-click (on desktop) or tap on the three dots menu (on mobile app) and choose “Delete.” The entire folder and all its contents will be sent to the OneDrive Recycle Bin.
Managing Your OneDrive Recycle Bin: Restoring or Permanently Deleting Files
While deleting OneDrive files doesn’t immediately erase them, it’s important to remember that they’re not truly gone until you empty the Recycle Bin. Let’s explore how to manage your OneDrive Recycle Bin, including restoring and permanently deleting files.
Accessing the Recycle Bin
- Desktop App: Right-click on the OneDrive icon in your system tray (Windows) or menu bar (Mac) and select “Show online.” This will open your OneDrive in a web browser window.
- Web Browser: Visit https://www.microsoft.com/en-us/microsoft-365/onedrive/online-cloud-storage and log in to your OneDrive account.
- Mobile App: Open the OneDrive app on your mobile device. Locate the “Settings” menu within the app (location may vary depending on the device and app version). Within the “Settings,” look for an option labeled “Recycle bin” or “Trash.”
Restoring Deleted Files
Once you’ve accessed the Recycle Bin, you’ll see a list of all the files you’ve recently deleted. Locate the file(s) you want to restore and right-click (on desktop/web browser) or tap and hold (on mobile app) on the file(s). Select “Restore” from the context menu. This will move the selected file(s) back to their original location in your OneDrive storage.
Permanently Deleting Files
If you’re certain you no longer need the deleted files, you can permanently delete them from the Recycle Bin. In the Recycle Bin list, select the files you want to erase permanently. Right-click (on desktop/web browser) or tap and hold (on mobile app) on the selected files and choose “Delete permanently” from the context menu. This will bypass the Recycle Bin and permanently remove the files from your OneDrive storage.
Advanced Considerations: Emptying the OneDrive Recycle Bin All at Once
While you can permanently delete files one by one, there’s also a way to empty the entire OneDrive Recycle Bin in one go. Here’s how to do it:
- Web Browser: Access your OneDrive online storage at https://www.microsoft.com/en-us/microsoft-365/onedrive/online-cloud-storage and log in with your Microsoft account.
- Locate the Recycle Bin: In the left-hand navigation pane, click on “Recycle bin.” This will display a list of all your deleted files.
- Empty the Recycle Bin: Look for the option labeled “Empty recycle bin” located at the top of the page. Click on this button to permanently delete all the files currently residing in your OneDrive Recycle Bin. Important Note: Once you confirm this action, there’s no way to recover the deleted files.
Keeping Your OneDrive Storage Organized: Additional Tips and Best Practices
Now that you’ve mastered the art of deleting OneDrive files, here are some additional tips to keep your OneDrive storage organized and efficient:
Utilize Folders Effectively
Create a clear folder structure to categorize your files. This will make it easier to find what you need later and streamline your workflow.
Take Advantage of File Naming Conventions
Develop a consistent system for naming your files. Descriptive file names will make it much easier to identify files at a glance, saving you time and frustration.
Schedule Regular Cleanup Sessions
Set aside some time periodically to delete OneDrive files you no longer need. This will help prevent your storage space from becoming cluttered and ensure optimal performance.
Consider a Local Backup
While OneDrive offers robust storage solutions, having a local backup of your critical files can provide an extra layer of security.
Explore OneDrive Sharing Features
OneDrive allows you to easily share files and folders with others. This functionality can be a valuable tool for collaboration, but remember to manage your shared files wisely to avoid unnecessary clutter.
Granular Permission Control
When sharing files or folders, you can define specific permission levels for each recipient. This allows you to control what actions they can take with the shared items, such as viewing, editing, or downloading.
Password Protection
For added security, you can add a password to shared links. This ensures that only authorized individuals with the password can access the shared content.
Stop Sharing When Needed
OneDrive doesn’t restrict you to permanent sharing. You can easily revoke access to shared files and folders whenever the need arises. This helps maintain control over your data and prevents unauthorized access.
Embrace OneDrive Integration with Other Microsoft Services
OneDrive integrates seamlessly with other Microsoft services like Word, Excel, and PowerPoint. This allows you to co-edit documents in real-time with colleagues, further enhancing collaboration and streamlining workflows.
Stay Informed with OneDrive Notifications
OneDrive offers customizable notification settings. You can choose to receive alerts for various actions, such as when someone shares a file with you or modifies a shared document. This can help you stay up-to-date on activity within your OneDrive storage.
The Future of File Storage: Potential Advancements in OneDrive
The realm of cloud storage is constantly evolving, and OneDrive is no exception. Here’s a glimpse into some potential future advancements:
Enhanced Security Features
Security is paramount in the cloud storage landscape. We can expect to see even more robust security measures implemented in OneDrive, such as advanced encryption protocols and multi-factor authentication options.
Increased Storage Capacity
As technology progresses, storage capacities are likely to continue to expand. This will allow users to store even more data in their OneDrive accounts, catering to the ever-growing need for digital space.
Integration with Artificial Intelligence
Artificial intelligence (AI) has the potential to revolutionize cloud storage experiences. Imagine AI-powered tools that can automatically categorize your files, suggest relevant actions based on your usage patterns, or even predict your storage needs.
Cross-Platform Compatibility
While OneDrive currently offers access across various devices, future advancements might see even deeper integration with different operating systems and platforms, creating a truly seamless cloud storage experience regardless of the device you’re using.
Conclusion: Maintaining a Clean and Efficient OneDrive
By understanding how to delete OneDrive files effectively, utilizing organizational strategies, and staying informed about potential future developments, you can ensure that your OneDrive storage remains a valuable asset in your digital life. Remember, a well-organized and clutter-free OneDrive translates to a more efficient and productive workflow, allowing you to focus on what matters most – getting things done!


Add Comment