Looting in the post-apocalyptic wasteland of 7 Days to Die is an exhilarating endeavor, but your backpack can quickly transform from a treasure trove to a cluttered mess. Unwanted items not only weigh you down but also make locating essential supplies a chore. Fear not, fellow survivor! This comprehensive guide will equip you with the knowledge to delete items in 7 Days to Die, ensuring your inventory remains streamlined and your scavenging efforts productive.
Can You Even Delete Items in 7 Days to Die?
Absolutely! Unlike some survival games, 7 Days to Die offers multiple methods for deleting unwanted items from your inventory. This flexibility allows you to tailor your approach based on the situation and the type of items you want to dispose of.
Deciding What to Delete in 7 Days to Die
Before diving into deletion methods, consider these factors when deciding what to dispose of:
- Item Value & Utility: Is the item genuinely useless, or might it have a future purpose? Prioritize deleting cumbersome items with little value, especially if they’re weighing you down.
- Repair Potential: Some damaged tools or weapons can be repaired using repair kits or specific materials. Unless the item is beyond repair, consider holding onto it for later restoration.
- Trading Opportunities: Certain traders in 7 Days to Die might be interested in purchasing some of your unwanted items. This can be a way to offload clutter while obtaining valuable resources like dukes (the in-game currency).
Dropping Items: The Primary Deletion Method
The most straightforward method for deleting items in 7 Days to Die is simply dropping them.
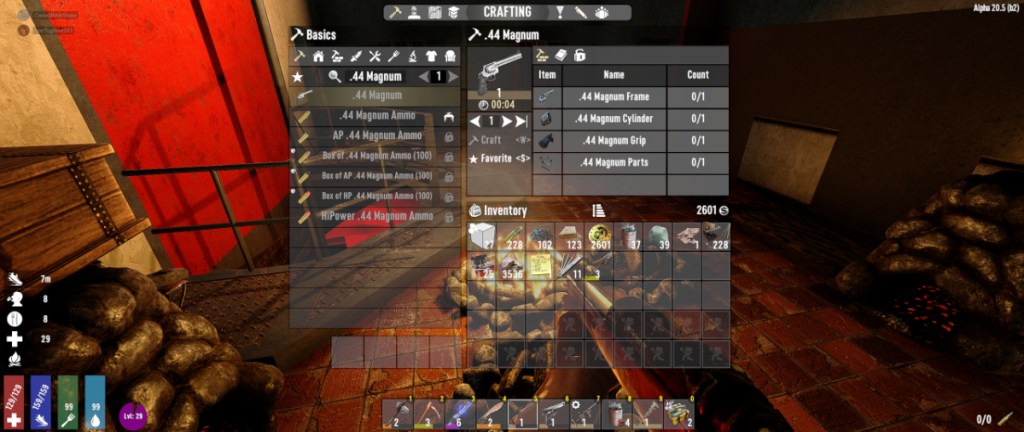
- Access Your Inventory: Press “I” on your keyboard (or your assigned inventory key) to open your inventory screen.
- Locate the Unwanted Item: Find the item you wish to discard within your inventory grid.
- Use the Drop Key: While hovering over the unwanted item, press the designated “drop” key (typically “Q” by default). Alternatively, you can right-click the item and select “Drop” from the context menu.
- Confirm the Deletion (Optional): A confirmation prompt may appear, depending on your settings. Press “Yes” to permanently remove the item.
Voilà! The unwanted item has been dropped from your inventory and now resides on the ground. Be aware that dropped items remain accessible in the world for a period before despawning. Be careful not to accidentally drop something valuable near a horde or in a dangerous area.
Creative Mode Deletion (For Specific Scenarios)
If you’re playing in Creative Mode, you have an additional option for item deletion:
- Activate Creative Menu: Press the “U” key to toggle the Creative Menu on and off.
- Enable Dev Tools: If necessary, activate developer tools within the Creative Menu for additional functionalities.
- Use the Dev Super Wrench: Navigate to the “Tools” tab within the Creative Menu. Select “Dev Super Wrench” from the available tool options.
- Target the Unwanted Item: Equip the Dev Super Wrench from your hotbar. Simply left-click on the unwanted item in your inventory to instantly delete it.
Important Note: Creative Mode deletion is exclusive to Creative Mode gameplay. This method won’t work in regular Survival Mode playthroughs.

Advanced Deletion Techniques: Mods and Server Administration
Beyond the core deletion functionalities in 7 Days to Die, the world of this game extends beyond the vanilla experience. Here’s a look into deletion possibilities with mods and server administration:
- Mod Functionality: Certain mods may introduce additional deletion mechanics. These might include specialized trash bins for item disposal or vendor-specific deletion options. Always refer to the documentation of your chosen mods for specific instructions.
- Server Administration: If you’re managing a 7 Days to Die server, you may have access to server-side tools or commands that allow for item deletion on a broader scale. Consult your server administration documentation for details on these functionalities.
Beyond Deletion: Inventory Management Tips for 7 Days to Die
While deletion is a useful tool, here are some additional tips for maintaining a healthy inventory:
- Prioritize Crafting: Focus on crafting essential tools and weapons instead of stockpiling resources. This reduces the need to carry around excessive crafting materials.
- Use Storage Containers: Implement a consistent storage system. Devote specific containers for different item categories (e.g., tools, weapons, building materials, and food). This makes finding what you need within your base a breeze.
- Organize Your Inventory: 7 Days to Die allows you to rearrange items within your inventory grid. Group similar items together for better visual clarity and faster access.
- Hotbar Optimization: Assign frequently used items like weapons, bandages, or torches to your hotbar slots for quick access without needing to navigate your full inventory.
- Embrace the Recycle Feature: The “Recycle” option within your inventory allows you to break down certain unwanted items into their base materials. This is a valuable way to recover resources from clutter, especially during the early game when resources are scarce.
By mastering deletion techniques and implementing effective inventory management strategies, you will be well on your way to conquering the challenges of 7 Days to Die. Remember, a well-organized inventory, free from unnecessary clutter, allows for quicker looting, efficient crafting, and ultimately, a higher chance of survival in the unforgiving wasteland. So, the next time you’re out scavenging, leverage your newfound knowledge to keep your inventory lean and mean and dominate the world of 7 Days to Die!


Add Comment